
Fixing drywall holes is essential for any homeowner, whether dealing with small dents, medium-sized damage, or large gaping holes. Each type of hole requires different techniques and tools, but the good news is that patching drywall holes in walls can be a straightforward DIY project with the right guidance. From small nail holes to large sections of damaged drywall, this guide will walk you through how to patch drywall, no matter the size of the hole, using simple techniques.
Whether you’re curious about how to patch a big hole in drywall or simply need to know the steps for smaller repairs, this blog provides detailed instructions for fixing drywall in your home. Let’s get started.
What You’ll Need
Before you begin patching drywall holes in walls, it’s important to gather everything required for the job. Here’s a breakdown of the materials and tools you’ll need for a successful repair.
Materials
Drywall Patch or Piece of Drywall
You’ll need a patch, or a piece of drywall, to cover the hole.
Joint Compound (Mud)
Essential for filling and smoothing the patch for a seamless finish.
Mesh or Paper Drywall Tape
Used to secure the patch and prevent future cracks at the seams.
Paint and Primer
Necessary to blend the repaired area with the rest of the wall for a polished look.
Tools
Utility Knife
To trim and clean up the edges around the hole, ensuring a smooth surface for patching.
Sanding Sponge or Sandpaper
For smoothing the joint compound after it dries, providing an even finish.
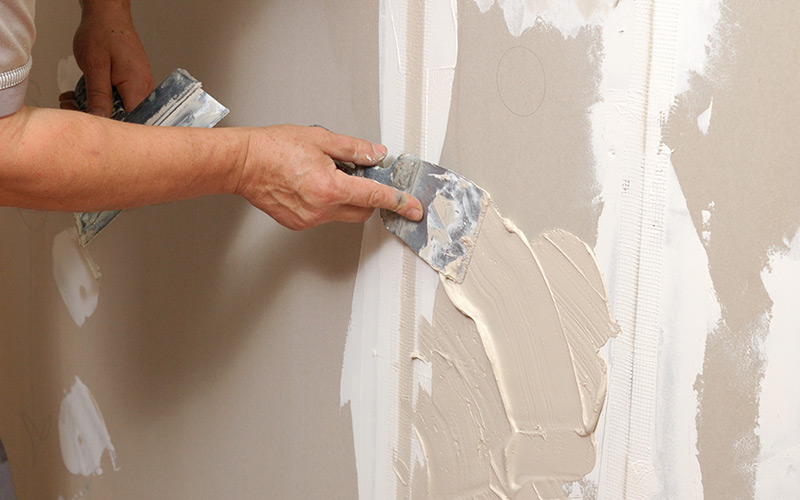
Putty Knife
Used to apply and spread joint compound over the patch and seams.
Drywall Screws (for Large Holes)
For securing larger drywall patches in place.
Drill or Screwdriver
Used to drive drywall screws into place for large repairs.
Small Holes: How to Fix Nail Holes or Dents in Drywall
Small holes, such as nail holes or minor dents, are common issues that can be quickly repaired. Here’s how to patch drywall holes that are small in size:
Step 1: Clean the Area
Using a utility knife, remove any loose drywall material around the hole. This will provide a clean surface for the patch to adhere to.
Step 2: Apply Joint Compound
Apply a small amount of joint compound (also known as mud) over the hole with a putty knife. Smooth it out so that it’s flush with the wall surface.
Step 3: Sand and Paint
Once the compound is dry, lightly sand the surface until smooth. Apply primer, then paint over the patch to match the rest of the wall. Fixing a hole in drywall can be as simple as these three steps for small holes.
Medium Holes: How to Patch a Hole the Size of a Doorknob
A medium-sized hole, such as one made by a doorknob, requires a little more effort than a small dent. Here’s how to patch a medium hole in drywall:
Step 1: Clean and Trim the Hole
Use a utility knife to clean and trim the hole, ensuring that the edges are smooth and ready for the patch. If you’re wondering how can you fix a hole in a wall, it starts with creating a clean area for the patch.
Step 2: Attach a Drywall Patch
For medium-sized holes, use a self-adhesive drywall patch. This type of patch sticks directly to the wall and covers holes up to 6 inches in size. Smooth it over the hole.
Step 3: Apply Joint Compound
Once the patch is in place, apply joint compound over the patch with a putty knife. Feather the edges of the compound to blend it into the wall.
Step 4: Sand and Paint
Allow the compound to dry completely before sanding it smooth. Finish by priming and painting the drywall area to match the rest of the wall.
Large Holes: How to Repair a Large Hole in Drywall
For larger holes, such as those over 6 inches, you’ll need to use a more involved process. Here’s how to fix a large hole in drywall:
Step 1: Cut Out the Damaged Area
Use a utility knife to cut a square or rectangular section around the damaged area. This will create a clean opening for your drywall patch.
Step 2: Cut a New Drywall Patch
Cut a new piece of drywall to fit the hole exactly. This patch will be inserted into the hole, creating a seamless fix for the damage.
Step 3: Secure the Patch
Use drywall screws to secure the patch into place. Place the screws about 1-2 inches from the edges to ensure the patch stays secure.
Step 4: Apply Tape and Joint Compound
Apply drywall tape over the seams where the patch meets the existing wall. Next, use a putty knife to spread joint compound over the tape, feathering the edges to blend it into the wall.
Step 5: Sand, Prime, and Paint
Once the joint compound is dry, sand the area until it’s smooth. Finally, prime and paint the patched area to match the surrounding wall. Fixing a large hole in drywall requires a few extra steps, but it’s a straightforward process with the right tools.
How to Patch a Big Hole in Drywall with Confidence
When learning how to patch a big hole in drywall, it’s important to take your time with each step. A well-executed patch will blend seamlessly into your wall, making it look as if the damage never happened.
Fixing a Hole in Sheetrock vs. Drywall
It’s important to note that sheetrock and drywall are essentially the same material, with Sheetrock being a brand of drywall. Therefore, whether you’re patching a hole in a sheetrock or patching drywall holes in walls, the method remains the same. The steps for fixing sheetrock are identical to those for standard drywall repairs.
The Importance of Drywall Repair: Elevating Your Space
Not only does fixing drywall holes enhance the aesthetics of your home, but it also ensures structural integrity. A well-maintained wall adds value to your space, preventing further issues like cracks or moisture buildup. Whether you’re preparing your home for sale or simply improving your living environment, properly repaired drywall elevates the overall look and feel of your home.
Cost of Drywall Repair
The cost of patching drywall holes can vary depending on the size of the hole and the materials needed. For smaller holes, the cost can be minimal—usually only the cost of joint compound, a drywall patch, and some tools you likely already have on hand. Larger holes, however, may require additional drywall sheets and screws, slightly increasing the overall expense. If hiring a professional, labor costs will also factor into the total.
Pro Tips for a Professional Finish
- Feather the Edges: When applying joint compound, feather the edges out with a wide putty knife. This will help the patch blend smoothly into the wall.
- Multiple Layers: For large holes, apply multiple layers of joint compound, allowing each layer to dry before adding the next. This ensures a smoother finish.
- Prime Before Painting: Always apply primer before painting the patched area to ensure even paint coverage.
Drywall Repair in the Toronto Area
For those living in the Toronto area, drywall repair is a common household project, particularly for older homes where walls may show signs of wear. Whether you’re dealing with holes caused by home renovations or everyday damage, knowing how to fix drywall holes ensures that your home maintains its beauty and functionality.
Benefits of Proper Drywall Repair
- Enhanced Aesthetics: Smooth, unblemished walls make your home look polished and well-maintained.
- Structural Integrity: Repairing drywall prevents further damage and keeps your walls strong.
- Increased Property Value: A well-maintained home, free of unsightly holes or dents, holds higher value on the market.
Related Articles
- 5 Key Reasons To Hire Expert Drywall Painting Contractors
Explore why fixing drywall is crucial for maintaining the quality and value of your home. - 5 Tips For Perfect Drywall Patching Every Time
Learn practical tips to ensure a flawless drywall repair, whether you’re a beginner or a seasoned DIYer.
By following these instructions, you can confidently complete fixing drywall holes in walls, ensuring that your repairs blend seamlessly with the rest of your wall. Now that you know how to patch drywall holes, you can tackle any drywall repair with ease.