Drywall Repair Services

Drywall Repair and Installation Services

Experience exceptional results with our professional drywall services. Whether it’s installation, repair, or finishing, we focus on delivering efficiency, precision, and unmatched quality. Every project is handled with meticulous attention to detail and innovative techniques to ensure a smooth and seamless process from start to finish.

LBE Contracting skilled team is committed to exceeding your expectations, providing reliable craftsmanship that transforms your vision into reality. From flawless finishes to durable solutions, we ensure superior outcomes for all your drywall needs. Let us bring your space to life with expert care and attention.

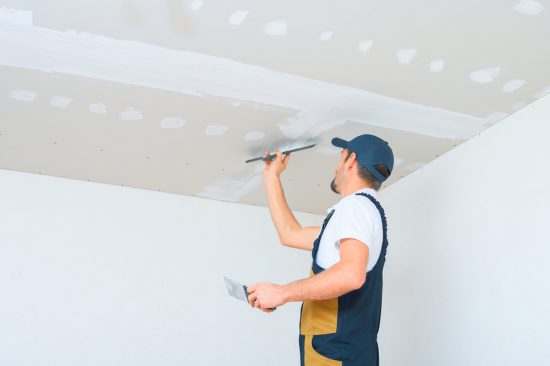
Worker applying drywall with a trowel tool during installation

Why Choose LBE Contracting for Drywall Installation and Repair?

When it comes to drywall installation services, our approach combines precision, quality, and efficiency. We excel in addressing all aspects of drywall, from repairing drywall ceilings to ensuring smooth finishes for new installations. Trust our experienced team to deliver ceiling drywall repair and water-damage restoration that enhances the beauty and durability of your space.

Benefits of Professional Drywall Installation

  • Flawless Finish: Our team ensures the highest-quality drywall finish, ideal for painting or wallpaper application.
  • Durable Results: With LBE Contracting, your drywall is built to last, even in high-traffic areas.
  • Customized Solutions: We tailor our services to meet your unique requirements, from drywall ceiling repair to specialized projects.

Style Drywall Texture : 3 Different Types?

Choosing the right type of drywall for your project is essential to ensuring durability, safety, and performance. Depending on the specific needs of your space, different types of drywall offer varying levels of protection, moisture resistance, and fire resistance. Here are three of the most common types of drywall that homeowners and businesses can consider:

1. Standard Drywall inc

Standard drywall is the most commonly used type in residential and commercial projects. It’s made from a gypsum core sandwiched between two sheets of paper. This type of drywall is suitable for interior walls and ceilings in most rooms, excluding areas with high moisture or special safety requirements. Best for: Living rooms, bedrooms, hallways, and offices. Benefits: Cost-effective, easy to install, and widely available. Drawback: Not moisture or fire-resistant, so it’s unsuitable for bathrooms or kitchens.

2. Moisture-Resistant Drywall

Moisture-resistant drywall, also known as greenboard, has a special coating that makes it more resistant to moisture and mold growth. This makes it a popular choice for areas that are prone to humidity, like bathrooms, kitchens, and laundry rooms. While it is moisture-resistant, it’s not completely waterproof, so it should not be used in direct contact with water (e.g., showers). Best for: Bathrooms, kitchens, laundry rooms, and basements. Benefits: Provides extra protection against moisture and helps prevent mold. Drawback: Costs more than standard drywall and is still not fully waterproof.

3. Fire-Resistant Drywall

Fire-resistant drywall, also known as Type X drywall, is designed to slow the spread of fire. It’s made with non-combustible fibers that make it denser than regular drywall, offering additional fire protection for homes and businesses. This type of drywall is often required by building codes for certain areas, such as garages, utility rooms, and between apartment units. Best for: Garages, utility rooms, stairwells, and shared walls between units. Benefits: Increased fire resistance, meeting safety standards for fire codes. Drawback: Heavier and more difficult to install compared to regular drywall.
 

Get a Free Quote for Drywall Repair or Installation

Looking to transform your space with expert drywall installation or repair services? Don’t wait—get a FREE quote today!

How to Fix Wall Damage: The right way

Drywall materials list​

To install drywall successfully, having the right materials and tools is essential. You will need drywall sheets, drywall screws, joint compound, drywall tape, and corner beads. For tools, make sure you have a tape measure, utility knife, drywall saw, T-square, drill, and a drywall screw gun. Additionally, a mud pan, putty knife, and sanding block are necessary for the finishing stages. Having all the proper materials and tools prepared will ensure a smooth and efficient installation process.

Preparing Drywall Before Repair

Proper wall preparation is key to a smooth drywall installation. Begin by inspecting the wall framing to ensure that all studs are straight and evenly spaced, typically 16 to 24 inches apart. Remove any old screws, nails, or debris from the surface to avoid obstructions. If the wall has any uneven areas, use a sanding block to smooth it out. It’s also important to install insulation, electrical wiring, and plumbing at this stage if needed. By taking the time to prepare the wall correctly, you’ll ensure a faster and more efficient drywall installation with a professional-looking finish.

Best Way to Cut a Piece of Drywall

Cutting drywall accurately is essential for a clean installation. Start by measuring the area where the drywall will be placed, marking the cut line with a pencil and a T-square for precision. Use a utility knife to score along the marked line, applying steady pressure. Once the score is deep enough, gently snap the drywall along the line by applying pressure to the opposite side. Finally, use the utility knife to cut through the backing paper. For more intricate cuts, such as around outlets or corners, use a drywall saw for better control and accuracy.

Drywall texture styles​

Once your drywall is securely installed, it’s time to give it a polished look. Start by applying a smooth layer of joint compound over the seams and screw holes, then sand the surface to a perfect finish. After sanding, you can choose to prime and paint the drywall in your desired color. For added texture and character, consider using techniques like sponging, stippling, or knockdown texture. You can also add decorative trim or molding to enhance the style of the room. With the right finishing touches, your drywall will blend seamlessly into your space and elevate the overall design.

Replace Drywall After Damage

If your drywall becomes damaged, whether due to moisture, cracks, or impact, replacing it is often the best solution. Begin by cutting out the damaged section with a utility knife or drywall saw, ensuring clean, straight edges. Measure and cut a new piece of drywall to fit the opening. Secure it to the studs using drywall screws, and then apply joint compound and drywall tape to blend the seams. After sanding and smoothing the surface, prime and paint to match the rest of the wall. Replacing damaged drywall will restore the appearance and integrity of your walls.

Required Time to Install Drywall

The time it takes to install drywall can vary based on the size of the project and your level of experience. For a typical room, the installation process can take anywhere from a full day to a couple of days. This includes measuring, cutting, hanging the drywall, and securing it with screws. Additional time is required for applying joint compound, taping seams, and sanding, as each layer of joint compound needs time to dry. For larger projects or more complex spaces, the timeline can extend, but with proper preparation and the right tools, drywall installation can be completed efficiently.

Complete Drywall Care: Patching, Painting, and Installation!

Drywall projects often need more than just installation. From fixing small cracks and holes with drywall patching to adding the perfect finishing touch with drywall painting, each step plays a key role in creating a polished and durable result. By combining these services, you can restore and refresh your walls quickly and efficiently.

Whether your drywall needs a quick patch, a fresh coat of paint, or a complete installation, these services work hand-in-hand to bring out the best in your space.

Learn More About Our Services!

Frequently Asked Questions

Our drywall installation services include measuring and cutting drywall sheets, securing them to walls or ceilings, taping and mudding seams, and providing a smooth finish ready for painting or wallpapering.

Yes, we specialize in repairing water-damaged drywall, including ceiling drywall repair and wall restoration. We ensure damaged areas are replaced or patched seamlessly to restore the integrity and appearance of your drywall.

The cost of drywall repair depends on the extent of the damage. Small repairs, like patching a hole, are more affordable, while larger jobs such as water damage ceiling repair may require additional materials and labor. Contact us for a detailed quote.

Drywall installation typically takes 1–3 days, depending on the size and complexity of the project. For larger spaces, such as commercial areas, the timeline may extend slightly.

We use a step-by-step process that includes cleaning the area, applying a drywall patch or tape, smoothing it with joint compound, and sanding it for a flawless finish. For larger holes, we use new drywall pieces for a seamless repair.

Drywall and Sheetrock are essentially the same product. Sheetrock is a brand name for drywall, which consists of a gypsum core sandwiched between two layers of paper.

Drywall needs time to dry after installation and finishing. Once the joint compound is completely dry, you can proceed with painting. This usually takes 24–48 hours, depending on the conditions.

Drywall Repair Services Near Me